I was sitting on the back porch in the late afternoon sun, minding my own business and enjoying a rare quiet moment, when I realized the neighbor was waving at me from his tractor. Normally, that’s just Southern hospitality—but I was wearing my husband’s favorite 'holy' yard-work shirt. You know the one. It has more ventilation than actual fabric and a questionable stain from that time we tried to change the oil on the mower ourselves.
It hit me right then: our half-acre is beautiful, but it is not private. Every time we want to have a quiet dinner or a messy DIY session on the porch, we’re basically on a stage for the whole neighborhood. We didn't want a fortress, though. In the NC Piedmont, if you build a solid wall, you’ve just created a convection oven that traps the humidity and kills any hope of a breeze. We needed something that felt like a sanctuary but still let the air move.
The Pizza Box Blueprint and the Breeze-Catcher Strategy
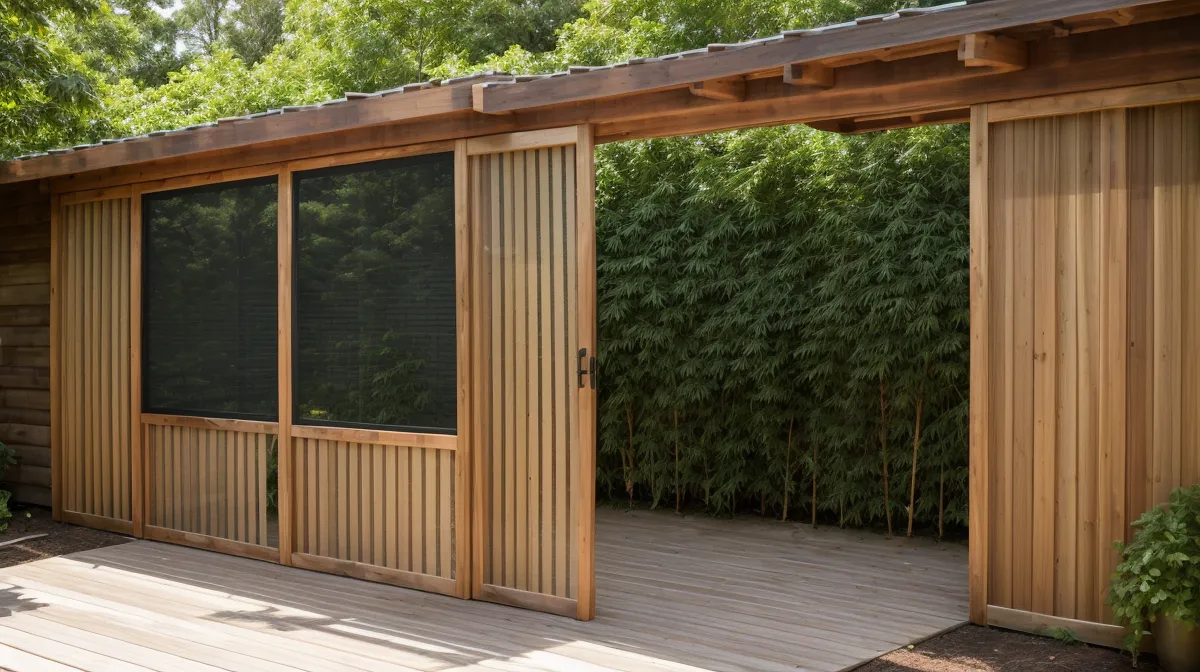
We spent a Friday afternoon in early May sitting at the kitchen island with a grease-stained pizza box—the only paper we could find—mapping out a design. I’m the one who usually handles the 'vision' (which is code for looking at pictures online), and he’s the one who tells me why my vision will fall over in a stiff wind. This time, we agreed on a louvered cedar design. Instead of solid panels, we wanted angled slats that would block the line of sight but act like a series of small wings to catch the wind.
Most people think a privacy screen should be a solid barrier. Honestly? That’s a mistake in a climate like ours. If you build a fixed, wind-resistant wall, you’re fighting physics. Eventually, the wind will win, or you’ll just sit there sweating in stagnant air. We decided on a modular, ventilated screen. By spacing the slats and angling them slightly, we could keep the neighbors' eyes out but let the spring breeze in. It’s the difference between sitting behind a wall and sitting under a tree.

We debated using ground spikes because, frankly, digging in North Carolina red clay is a special kind of torture. But we’ve learned the hard way with our chicken coop that if you want something to stay level after a week of rain, you dig. We checked our Lumber Dimensions Reference Chart and realized that our '4x4' posts were actually 3.5 inches square, which matters when you're buying post-hole hardware. We also knew the frost line depth in the North Carolina Piedmont is about 12 inches. It’s not the Arctic, but you still have to get deep enough to keep the ground from heaving your hard work out of the dirt.
Fighting the Clay and the Oak Root Stand-Off
By late Saturday morning, the humidity was already starting to climb toward summer levels. We were out there with a manual post-hole digger, which is essentially a giant pair of tweezers designed to break your spirit. We hit a massive oak root about eight inches down on the very first hole. I spent four hours fighting that single root with a reciprocating saw and a pry bar while he hauled the bags of concrete.
Speaking of hauling—never underestimate the weight of wet wood. Pressure-treated lumber weight is approximately 60 pounds per cubic foot. When you’re dragging 4x4s and 2x4s across a half-acre lot, you feel every single ounce of that southern yellow pine. We were using pressure-treated wood for the structural posts because it’s the only thing that survives the damp NC soil, but we planned to use cedar for the slats for that beautiful, rot-resistant finish.

The scent of the project changed as soon as we started cutting the cedar. There’s nothing quite like the sharp, resinous scent of fresh cedar sawdust clinging to my sweaty forearms in the humid afternoon air. It almost makes the blisters worth it. Almost. We were using 2x4s for the horizontal framing, and I had to keep reminding myself that the actual dimensions of a 2x4 are 1.5 inches by 3.5 inches. If you try to build a frame based on the 'nominal' name, your slats won't fit, and you’ll end up staring at a pile of expensive wood scraps.
The Moment Everything Tilted
We were making great progress by Saturday afternoon. The posts were in, the concrete was setting, and we were starting to mount the brackets for the louvers. That’s when the 'stubbornness' part of our DIY philosophy kicked in. We were tired, we were hungry, and we started rushing. I held the level while he adjusted the main corner post. 'Looks good!' I shouted over the noise of the impact driver.
He stepped back, wiped the sweat from his eyes, and just stood there. I looked at the level again. The sinking feeling when the level bubble hit the far edge, proving we’d set the main post at a slight, permanent tilt, is something I wouldn't wish on my worst enemy. It wasn't much—maybe half a degree—but once you see it, you can't un-see it. In a rural backyard, 'perfection' is a relative term, but 'noticeably crooked' is a hard pill to swallow. We had to shim the brackets just to make the slats look horizontal even though the post was leaning like it had spent too much time at a local brewery.
Then came the math fail. We realized our 'perfectly' measured slats were slightly off because we forgot to account for the thickness of the bracket hardware. We had measured the opening between the posts, but hadn't subtracted the quarter-inch that the metal brackets added on each side. We had to trim 42 individual cedar slats by a half-inch each. It was a tedious, dusty hour of work that could have been avoided if we’d just measured twice. But hey, that’s why we’re not contractors.
Assembly and the Sweet Tea Reward
By Sunday at sunset, the screen was finally standing. We had opted for a modular approach, building the slat sections on the ground and then lifting them into place between the posts. This made it much easier to ensure the spacing was consistent. Because we wanted that 'breeze-catcher' effect, we left a one-inch gap between each slat. It’s enough to block the neighbor’s view of our dinner table, but it lets the air flow through so the porch doesn't feel like a sauna.
We learned a lot about fasteners during this build, too. Pressure-treated lumber requires specialized ACQ-rated fasteners to prevent corrosion from the chemicals in the wood. If you use standard screws, the wood will literally eat them over time. We also knew we couldn't stain the thing right away. Wood must reach a moisture content below 19 percent before it can effectively absorb most exterior stains or sealants. Since our lumber was 'wet' from the yard, we knew we’d be looking at bare wood for at least a few weeks.
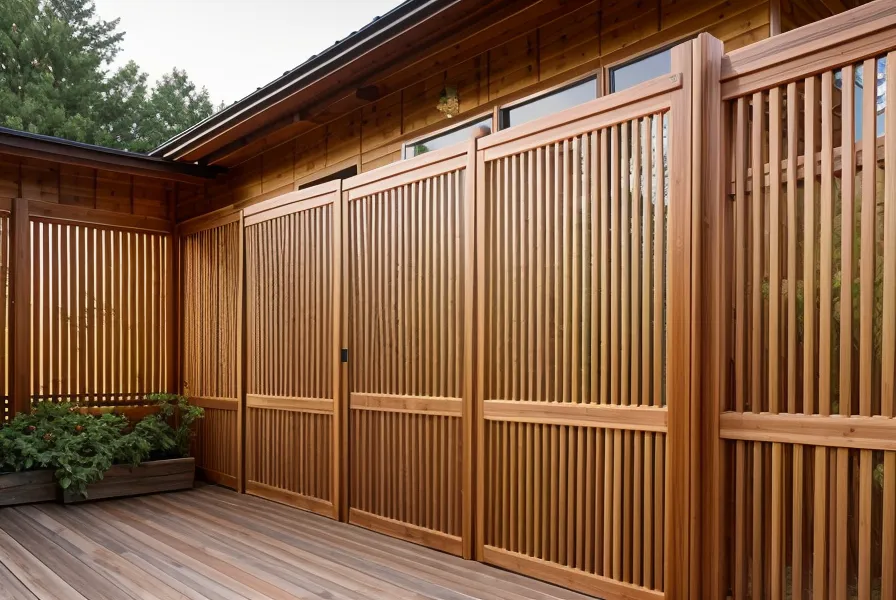
After about two weeks of curing, the wood had lightened up and was finally ready for a clear sealant. Sitting back there now, sipping sweet tea behind the finished screen and watching the sunset through the slats, is a completely different experience. Our half-acre finally feels like a private sanctuary rather than a stage. It’s not perfectly level, and if you look closely at the brackets, you can see where we had to 'improvise,' but it’s ours. It reminds me of when we were building a DIY outdoor kitchen without hiring a pro contractor—it’s the imperfections that make the story better.
If you’re thinking about doing this, don't let the fear of a crooked post stop you. Just remember to account for the breeze. A solid wall might give you privacy, but a ventilated screen gives you a place where you actually want to spend your time. And honestly? Even with the tilt, it looks a whole lot better than my husband's holy shirt.